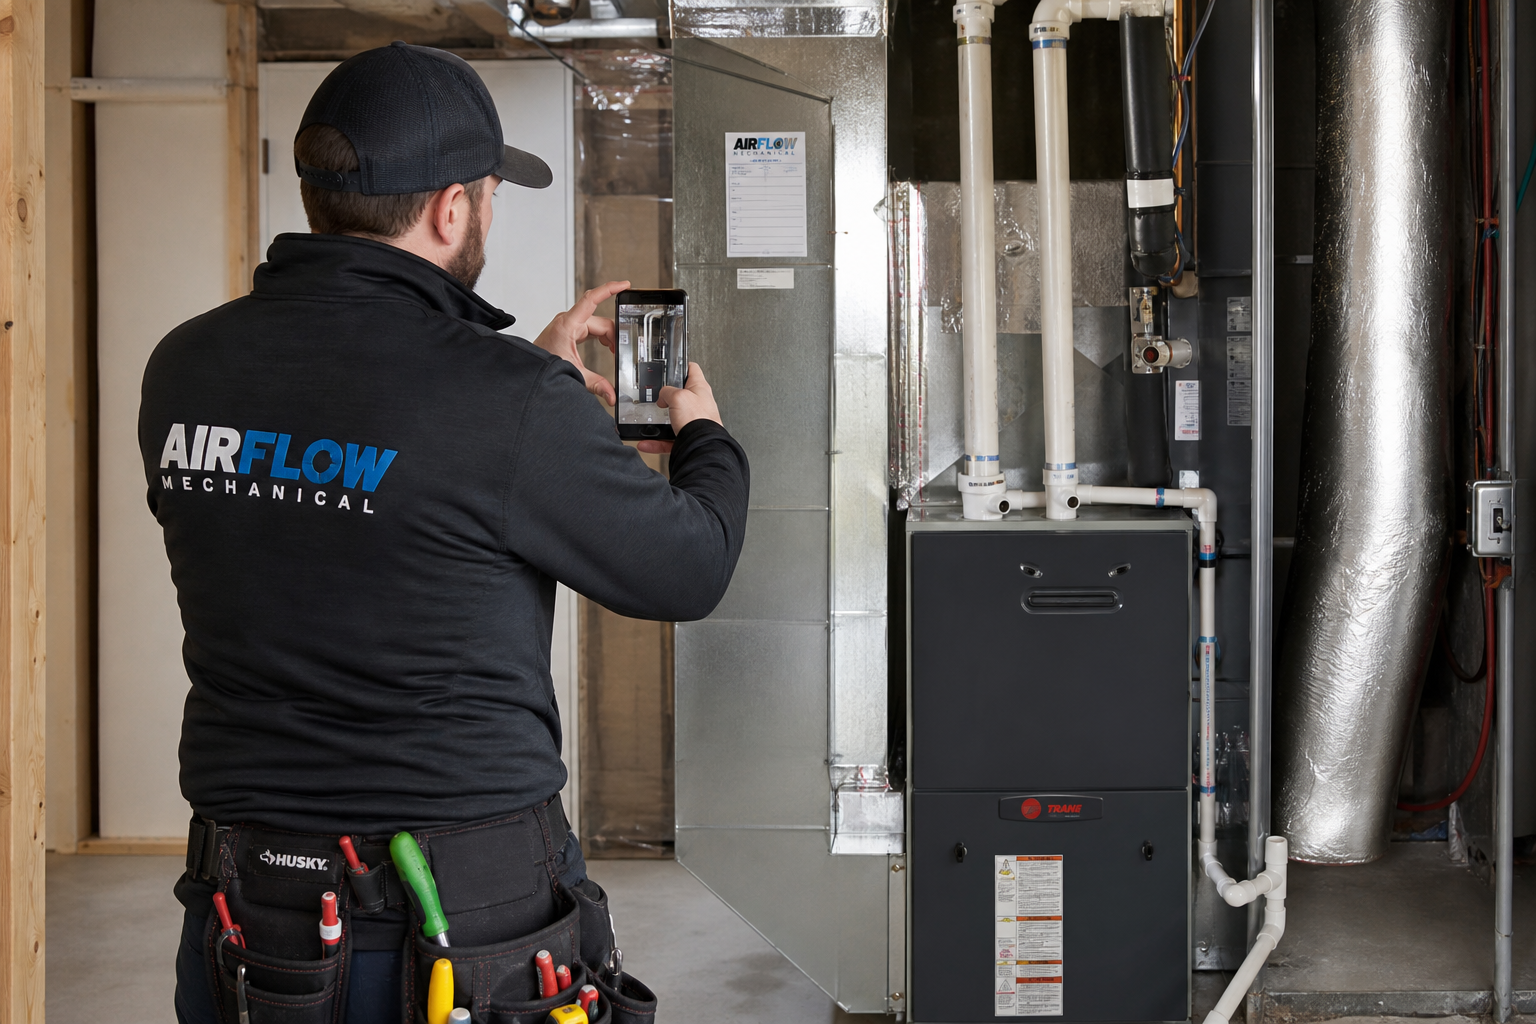
How HVAC Contractors Can Use Photo and Video Documentation to Prevent Scope Disputes and Change-Order Pushback
A practical field process for documenting existing conditions, hidden obstacles, and completed work so change orders feel justified instead of surprising.
Scope disputes rarely start because a homeowner wants to argue about HVAC details. Most of the time, they start because the customer thought one thing was included, the salesperson assumed a condition would be straightforward, or the install team discovered a problem that was never visible during the estimate. When that gap shows up on job day, change-order pushback follows.
That is where a consistent HVAC photo and video documentation process becomes valuable. Good documentation helps your team show what existed before work began, what was found during installation, and why certain changes were necessary. It also improves communication between sales, operations, installers, and the homeowner. Instead of relying on memory or verbal explanations, your team can point to clear visual evidence.
This is not about turning every technician into a filmmaker. It is about building a repeatable habit: capture the right images, organize them well, and use them at the right moments. When done correctly, photo and video documentation supports cleaner proposals, better approvals, faster office follow-up, and fewer arguments about what should or should not have been included.
Documentation works best when it starts before a problem appears. If your team only takes pictures after a disagreement begins, it feels reactive. If you document every job the same way, the process feels professional, routine, and easier for customers to accept.
Why does documentation reduce scope disputes in the first place?
Most scope conflicts come from one of three situations: hidden jobsite conditions, unclear assumptions, or weak handoffs between departments. Photo and video records help on all three.
First, they reveal existing conditions that may not be obvious in a written estimate. A note that says “limited attic access” is easy to overlook. A photo showing a tight scuttle, obstructed framing, and existing stored contents is much harder to dismiss. The same goes for damaged plenums, noncompliant venting, undersized return openings, inaccessible line set routes, or deteriorated pads and stands.
Second, documentation reduces dependence on memory. Salespeople forget details. Install managers inherit jobs they did not sell. Homeowners often remember the comfort promise but not every exclusion. A visual record gives everyone a shared reference point.
Third, documentation supports timing. Change-order pushback gets worse when homeowners feel blindsided. If your estimate photos already show questionable duct condition or difficult routing, your team can discuss potential contingencies before the truck arrives. That does not eliminate every surprise, but it lowers the chance that the homeowner hears about extra work for the first time while the old system is already disconnected.
Documentation also protects your company after the job is complete. If a customer later says a drain issue, wall opening, scratched floor, access limitation, or disconnected item was caused by your crew, before-and-after images can help clarify what existed. Local requirements vary, and your documentation process should fit your market and internal policies, but the principle is universal: evidence reduces ambiguity.
What should contractors photograph before the job starts?
The most useful pre-job documentation is not random. It should answer one question: what conditions could affect price, labor, materials, access, or customer expectations?
Start with wide shots that establish context. Capture the front of the home, side yard access, driveway, gate openings, condenser location, attic or crawl access points, and the mechanical room or closet. These images help explain logistics, property protection planning, and equipment movement challenges.
Then move to medium and close-up photos. Document the existing equipment, model and serial labels when visible, electrical disconnects, whip condition, pad or bracket condition, refrigerant line route, condensate routing, flue or venting arrangement, drain termination, filter arrangement, return and supply transitions, zoning components, and control wiring. If ductwork condition is uncertain, get images that show rust, kinks, crushed flex, air leakage, improvised returns, or space limitations that could affect a clean connection.
Take special care with access constraints. Photograph tight attic framing, steep ladders, finished spaces below attic walk paths, low crawl clearances, landscaping near outdoor units, rooftop access limits, and any stored belongings around the work area. These pictures do more than justify labor. They help your install manager plan manpower, protection materials, and time on site.
It is also smart to photograph surfaces adjacent to the work area before the job starts. Floors, walls, trim, countertops, and nearby stored items should be documented if your crew will be moving equipment through those spaces. This is not about distrusting the customer. It is about creating a normal record of pre-existing conditions so any later concern can be handled calmly and fairly.
- Wide shots of the home exterior and equipment locations
- Access points including attic, crawl, closet, basement, roof, or side yard entry
- Existing indoor and outdoor equipment from multiple angles
- Electrical, drain, venting, refrigerant, and control connection points
- Duct transitions, plenums, returns, and visible duct condition
- Potential obstructions such as framing, shelving, stored items, or finished surfaces
- Nearby surfaces and pathways that may need protection during installation
- Any visible condition that may trigger additional labor or materials
If your company sells replacement work, these photos should be captured during the estimate whenever possible, not left for installers to discover later. The best time to reduce change-order friction is before the contract is signed.
When is video more useful than still photos?
Photos are usually faster to review and easier to store, but short video clips can be better when the problem involves movement, sequence, scale, or navigation.
For example, a walk-through video is useful when showing a complicated equipment path through a finished home. A quick clip from the front door to the mechanical room can reveal stair turns, narrow halls, furniture constraints, and flooring transitions better than a set of still images. The same is true for attic or crawl routes where installers need to understand how far they must travel and what obstacles they will face.
Video also helps when documenting noise, vibration, airflow behavior, water movement, or intermittent conditions. If a drain is backing up, a short clip can show the actual condition more clearly than a static image. If a return platform is pulling from an unintended cavity, a narrated clip can help your office and the homeowner understand what your crew found.
The key is to keep videos short and purposeful. A two-minute clip with a clear explanation is usually more valuable than a ten-minute rambling walk-through. Have the person recording state what is being shown, where it is, and why it matters. That small habit makes later review much easier.
Video can also be effective for homeowner communication during change-order discussions. A short clip showing a collapsed section of duct, inaccessible line route, or unsafe connection often feels less confrontational than a technician trying to describe it verbally. The customer sees the issue directly, which lowers the sense that the contractor is exaggerating.
How should installers document unexpected conditions during the job?
This is where many companies get inconsistent. The crew finds a problem, tells the office, and keeps moving. Hours later, someone asks for proof, and the best image available is blurry, too tight, or taken after part of the area has already been cut apart. That weakens your position.
Train installers to pause and document in sequence before corrective work begins. First, capture a wide shot to show location. Second, capture a medium shot to show how the issue connects to surrounding components. Third, capture a close-up that clearly shows the defect, obstruction, damage, or mismatch. If needed, add a short video with verbal context.
Examples of conditions worth documenting immediately include hidden duct deterioration, plenum damage behind the old unit, oversized gaps around boots or returns, line set route problems, inaccessible chase conditions, condensate issues, structural interference, electrical deficiencies, failed supports, previous water damage, pest contamination, or venting conditions that prevent direct replacement as sold.
Time matters here. If the homeowner is present, your team should notify the office quickly and avoid making pricing promises in the field unless that is your company policy. The documentation should support a clean internal review first. Then the office or project manager can present the change clearly, with visuals, labor explanation, and next steps.
Good jobsite documentation should also include progress milestones. Take pictures after protection is set, after old equipment removal, after rough-in changes, after critical connections, and after final completion. This does not just help with disputes. It helps with training, quality control, and warranty-related file review later, even though specific warranty terms vary by manufacturer and contractor.
What makes documentation usable for office staff and change-order approvals?
Photos do not help much if they live in random personal camera rolls with no labels. The office needs fast access, consistent naming, and enough context to understand what they are looking at.
A practical standard is to organize every job into three groups: before, issue found, and after. Within those groups, use simple labels such as outdoor unit, indoor unit, ductwork, electrical, drain, venting, access, property protection, and completed install. If your software supports tags, use them. If not, use folder naming conventions that anyone in the company can follow.
Each documented issue should answer five things for the office team: what was found, where it was found, why it changes scope, what fix is recommended, and whether approval is needed before proceeding. If a picture does not help answer those questions, it may not be sufficient for change-order support.
Install photos become much more useful when paired with one or two written lines from the field. Something as simple as “Return drop heavily rusted behind unit, cannot reconnect reliably as quoted, recommend rebuild” gives the office a script for the customer conversation. Without that note, the office may misread the image and explain the issue poorly.
It is also worth deciding internally who is responsible for review. On some teams, the install manager approves documentation before a change-order request goes out. On others, the comfort advisor or project coordinator handles it. The exact workflow can vary, but ownership should be clear. If nobody owns the process, the office will continue chasing missing images while the field waits for answers.
The strongest change-order communication usually combines three things: one clear wide photo, one close-up of the issue, and one plain-language explanation of how the condition affects labor, materials, or system performance.
How can contractors present photo evidence to homeowners without sounding defensive?
Documentation should support trust, not replace communication. If your team presents pictures like courtroom evidence, the homeowner may become more skeptical, not less. The goal is to explain, not corner the customer.
Start by framing the reason for the conversation. A simple approach is: “Once we opened the area, we found a condition that was not visible during the estimate. I want to show you exactly what we are seeing so you can understand the recommendation.” That language is calm and transparent.
Then use the visuals in order. Begin with the wide photo so the customer can orient themselves. Move to the close-up to show the specific issue. If necessary, use a short video to explain access or hidden conditions. Avoid jargon unless you explain it immediately. “This return transition is deteriorated” may be clear to your team but not to a homeowner. “This metal connection is rusted through, so it will not seal properly to the new equipment” is clearer.
It also helps to distinguish between what was included originally and what changed. Customers resist change orders when they feel the contractor is moving the goalposts. You can reduce that reaction by saying, “The original scope assumed we could reconnect to existing duct in serviceable condition. After removal, we found this section is not serviceable, which is why we are recommending an additional rebuild.”
Give the homeowner time to ask questions. Pushback is not always distrust. Sometimes it is confusion, stress, or budget concern. Your documentation can make the issue easier to understand, but the conversation still needs empathy and patience.
Finally, avoid overstating certainty where local requirements vary or where inspection and code interpretation may differ. If a discovered condition raises a compliance or safety concern, explain that local requirements vary and that your recommendation is based on what your team found and what is needed for a proper installation in that setting.
What common mistakes make documentation less effective?
The first mistake is inconsistency. If only some jobs are documented thoroughly, the process feels selective. Selective documentation creates doubt because it looks like the company only takes pictures when it expects conflict. A standard process removes that impression.
The second mistake is poor image quality. Dark mechanical rooms, shaky close-ups, and pictures taken too close to identify context make it hard for office staff and homeowners to interpret what they are seeing. Installers do not need professional cameras, but they do need enough light, stable framing, and multiple angles.
The third mistake is documenting too late. If the crew has already removed the old unit, cut apart transitions, or started corrections, the original condition may no longer be obvious. Capture the issue before the surrounding evidence changes.
The fourth mistake is failing to connect documentation to the estimate. Photos are strongest when they support a specific assumption or exclusion. If your proposal mentions existing duct reuse where serviceable, condensate reuse where appropriate, or customer-provided clear access, your visuals can directly support that language when conditions differ on job day.
The fifth mistake is storing documentation in a way that is hard to retrieve. A great image buried in a text thread is almost useless when a customer calls the office three weeks later. Build a file structure that the service manager, sales team, and office can all access when needed.
The sixth mistake is over-documenting without purpose. Hundreds of random photos can overwhelm reviewers. Your team should focus on decision-making images, not just volume. The goal is clarity.
- Do not rely on one close-up without a wide location shot
- Do not wait until after demolition to capture pre-existing conditions
- Do not leave issue photos unlabeled or mixed with unrelated images
- Do not assume the office understands field conditions without notes
- Do not present documentation to homeowners in a confrontational tone
- Do not let personal phones and scattered messages become the only archive
What should a simple company-wide documentation standard look like?
A workable standard should be easy enough to follow on every job and specific enough to improve results. If the system is too complicated, crews will skip it when the schedule gets busy.
One practical framework is estimate, arrival, discovery, progress, and completion.
At estimate, capture the key existing conditions that affect scope and access. At arrival, capture home protection setup and confirm the baseline work area. At discovery, document hidden issues before any corrective work begins. At progress, capture major installation steps that may matter later, such as line routing, transitions, drains, venting, or support changes. At completion, capture final equipment, clean work areas, and finished details.
Assign responsibility by role. Comfort advisors document sales conditions. Lead installers document field discoveries and installation milestones. Project coordinators verify that job files are complete before closeout. If one person owns everything, the process usually breaks.
Your standard should also define minimum shot lists for common job types. A furnace-and-coil changeout needs one list. A heat pump conversion or rooftop replacement may need another. The point is not rigid bureaucracy. The point is making sure critical items are not forgotten.
It is also helpful to train from real examples. Show your team strong documentation from prior jobs and weak documentation that caused delays. Field employees learn faster when they can compare a useful “before, issue, after” set against a blurry single image that left the office guessing.
If your team wants a starting point, a simple checklist can cover most residential replacement jobs.
- Before: exterior access, existing equipment, labels, duct connections, electrical, drain, venting, route constraints, and surrounding surfaces
- Issue found: wide shot, medium shot, close-up, brief note, and approval status needed
- During: protection, removal area, rough-in changes, concealed work before cover-up, and critical component connections
- After: completed equipment, finished transitions, drain and venting path, thermostat or controls, exterior cleanup, and work area condition
- Closeout: upload, label, review, and store in the job file before final completion
Keep the process practical. The goal is not to create extra admin for its own sake. The goal is to reduce confusion, support fair pricing, and give everyone a shared understanding of what the job required.
Frequently asked questions
How many photos should an HVAC crew take on a typical replacement job?
There is no perfect number. The better rule is to capture enough images to show existing conditions, any hidden issue that changed scope, major installation milestones, and the final result. A smaller set of organized, useful images is better than a large set of random ones.
Should salespeople or installers be responsible for documentation?
Usually both. Sales should document estimate conditions and assumptions, while installers should document discoveries and completed work. A shared process prevents gaps between what was sold and what was found.
Can photo and video documentation help with homeowner trust even when there is no dispute?
Yes. Homeowners often appreciate seeing what was done, especially in attics, crawlspaces, closets, or rooftops they may never inspect themselves. Documentation can reinforce professionalism and transparency.
What if a customer pushes back even after seeing the photos?
Documentation does not guarantee agreement, but it improves your position. If pushback continues, stay calm, explain what changed from the original assumption, and keep the discussion focused on the visible condition and the recommended correction.
Do contractors need a formal written policy for this process?
A written internal standard is helpful because it creates consistency. It does not need to be complicated, but it should define who documents what, when images are uploaded, and how issue photos are tied to change-order communication.
Final thoughts
HVAC photo and video documentation is one of the simplest ways to improve scope clarity without changing your entire sales model. It helps the estimator sell more accurately, helps the installer communicate discoveries faster, helps the office support change orders with confidence, and helps the homeowner see the difference between an unexpected condition and an invented upcharge.
The contractors who benefit most are not necessarily the ones with the fanciest software. They are the ones with a repeatable habit. They capture the same categories of images on every job, label them consistently, and use them to explain work in plain language. Over time, that discipline can reduce friction, improve approvals, and create a cleaner record of what your team actually found and completed.
If your company struggles with scope disputes, start small. Build a shot list, assign responsibility, and review a few jobs every week. Once your team sees how often good documentation prevents confusion, the process becomes easier to maintain.
Join the HVAC Installer Network
Create an installer listing to help homeowners discover your business, learn about your services, view your company information, and connect with you about installation opportunities in your service area.
This article is for general informational purposes and is not legal, code, tax, or insurance advice. Local requirements vary, and company policies, documentation practices, permitting expectations, and approval workflows should be reviewed for your market and operating procedures.