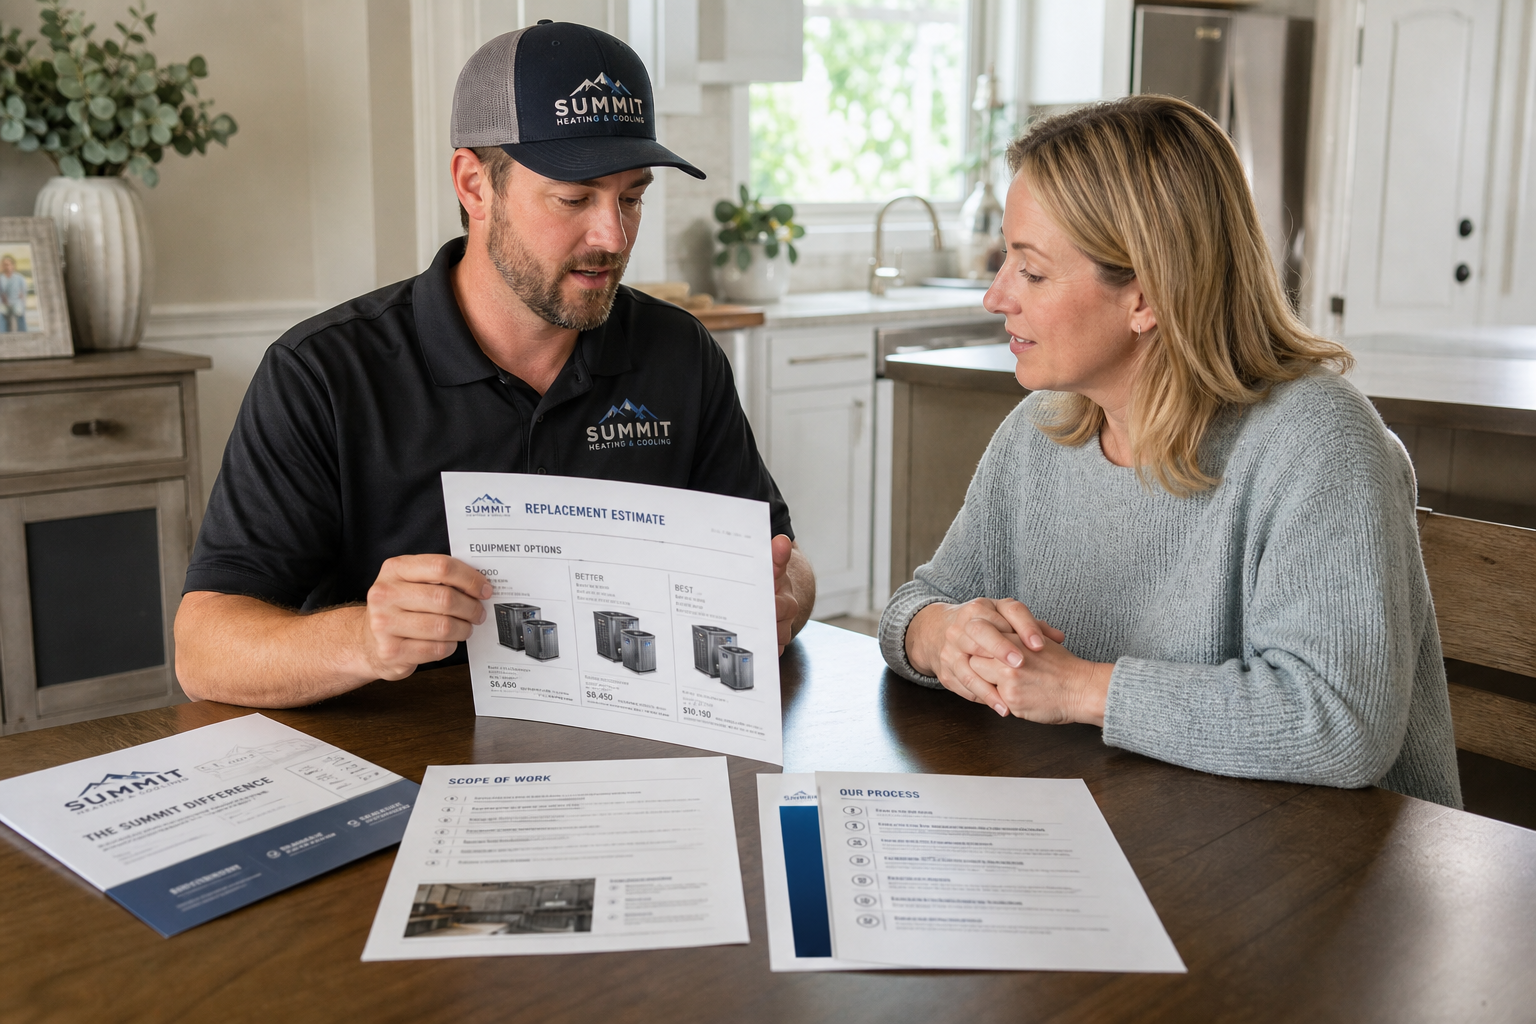
How HVAC Contractors Can Build a Replacement-Estimate Leave-Behind Packet That Increases Close Rates Without High-Pressure Sales
A simple, trust-building packet can help homeowners understand your recommendation, remember your company, and say yes after you leave.
Many replacement estimates are lost after the kitchen-table conversation, not because the contractor was too expensive, but because the homeowner became confused once the appointment ended. A spouse asks questions later, another company leaves a shorter price sheet, or the buyer simply forgets what made one proposal different from another. If your estimate leaves the home as a number on a single page, you are often asking the homeowner to remember your value without giving them a practical tool to review it.
That is where a strong replacement estimate leave-behind packet helps. It is not a high-pressure sales binder. It is a clear, organized package that makes your recommendation easier to understand when you are no longer in the room. It should reduce uncertainty, answer the most common follow-up questions, and make the next step feel straightforward.
For HVAC contractors, the goal is simple: make it easier for the homeowner to buy. A good packet supports your close rate by turning your estimate into a decision tool. It helps the customer compare options fairly, explains your process, reinforces professionalism, and keeps your company top of mind. It also helps your office because better-informed buyers usually create fewer clarification calls, fewer surprises, and fewer misunderstandings during scheduling and installation.
In this guide, we will break down how to structure a replacement estimate leave-behind packet, what to include, what to leave out, and how to make it useful without making it bloated. The best packets are practical, readable, and easy for your team to repeat consistently.
Contractors often focus on how to present the estimate in the home. Just as important is what the homeowner is left holding after you drive away.
Why does a replacement estimate leave-behind packet matter so much?
Most homeowners do not make an immediate replacement decision purely from technical confidence. They buy when they feel they understand the recommendation, trust the company, and can explain the choice to anyone else involved. A leave-behind packet supports all three.
First, it improves memory. During an estimate visit, homeowners hear a lot in a short period of time: equipment types, efficiency ratings, comfort concerns, airflow issues, thermostat options, installation steps, and financing or payment conversations if you offer them. Even when your explanation is strong, many details fade within hours. A leave-behind packet helps the customer revisit the logic behind your recommendation.
Second, it improves comparison. Homeowners often collect multiple bids, but they rarely compare them on equal terms. One quote may include permit handling, startup procedures, haul-away, controls, and scope details while another may be a price and model number only. If your packet clearly defines what is included, you reduce the chance that your proposal looks more expensive simply because it is more complete.
Third, it lowers the emotional pressure of the decision. Many customers dislike feeling sold. If your process is transparent and your packet lets them review the estimate calmly after the appointment, the buyer feels more in control. That usually creates better trust than repeated urgency or sales pressure.
Finally, a good packet helps your internal team stay consistent. When every comfort advisor or estimator uses the same core structure, your brand feels more professional. The office can answer questions more easily, installers know what was promised, and follow-up becomes cleaner because everyone is working from the same framework.
What should every replacement estimate leave-behind packet include?
The best packet is not the thickest one. It is the one that answers the buyer’s next questions in the clearest order. In most cases, a strong packet includes the following core pieces.
Start with a cover page. This should include your company name, logo, contact information, and a simple headline such as “Your HVAC Replacement Options” or “System Recommendation and Project Scope.” The homeowner should immediately know what the packet is and who it came from.
Next, include a one-page summary of the customer’s needs. This is one of the most overlooked pieces. Summarize the comfort complaints and project goals you discussed in plain language. For example, mention that the existing system is aging, the second floor runs warm, the customer wants quieter operation, or they are focused on reliability and straightforward operation. This shows that you listened and that your recommendation is tied to their concerns.
Then include the actual options page or pages. Keep these clean and comparable. If you present good, better, best options, use a format that makes the differences obvious. Include major features, not a wall of manufacturer language. Homeowners usually care more about what changes in comfort, sound, efficiency, controls, warranty handling through your company process, and expected installation scope than they do about model-number jargon. Avoid making promises you cannot verify, and note that equipment availability and local requirements vary.
After the options section, include a scope-of-work page. This is essential. Spell out what your company plans to do. Will you remove and dispose of old equipment, replace the indoor and outdoor units, update transitions, set pad or wall bracket as needed, connect electrical and refrigerant components according to job scope, test operation, and walk the homeowner through the new system? Your exact inclusions will vary by job, but the point is clarity. This page often separates serious contractors from price-only competitors.
Include a “what to expect” page for installation day. Homeowners want to know arrival windows, where your team will work, how long the project may take, whether they should secure pets, and what kind of access you need. Keep this practical. Avoid making rigid promises if local code, weather, equipment access, or hidden field conditions can affect timing.
It also helps to include a brief page about your company process and standards. This is not the place for inflated claims. Instead, explain your approach to load verification when applicable, equipment matching, startup checks, homeowner orientation, cleanup, and post-install communication. If permits or inspections may apply in your market, say local requirements vary and explain how your office addresses them on applicable jobs.
Add a simple next-steps page. Tell the homeowner exactly how to move forward. Include who to call, what happens after approval, how scheduling works, and what information your office may need. A packet should reduce friction, not just inform.
Finally, include FAQs. A short FAQ page can prevent many delays. Answer practical questions like whether someone needs to be home during installation, how thermostats are handled, whether duct or electrical modifications are included only if listed, and how your team handles startup and orientation.
How do you explain options without overwhelming the homeowner?
One of the biggest mistakes in replacement sales is assuming that more information automatically creates more confidence. It often does the opposite. A leave-behind packet should simplify choices, not multiply them.
The first rule is to organize options around outcomes. Instead of leading with model numbers, lead with what the homeowner gets. For example, one option may focus on basic replacement and reliability, another on quieter operation and improved comfort control, and another on higher efficiency and added features. The buyer does not need a technical data dump to understand the categories.
The second rule is to keep the comparisons parallel. If you compare three options, use the same headings for each one. Show system type, comfort level, sound expectations, control features, maintenance considerations, and installation notes in the same order. Inconsistent formatting creates confusion and makes your packet harder to scan.
The third rule is to avoid vague marketing language. Phrases like “ultimate comfort” or “premium performance” are weak if you do not explain what they mean. Tie features to homeowner experience. Variable capacity may mean longer, quieter operation and more even temperatures. A communicating thermostat may mean more control visibility. Better filtration options may mean support for indoor air quality goals when properly matched to the system and home. Keep it plain.
The fourth rule is to use limits honestly. If a comfort issue may also involve duct design, insulation, room orientation, or return air problems, say so. The packet should not promise that equipment alone will solve every complaint. Honest framing protects trust and reduces callbacks based on unrealistic expectations.
A useful approach is to create a one-page comparison chart, but keep it simple enough to read quickly. You want the homeowner to understand why one option costs more and whether the benefits matter to them. If the chart turns into a technical brochure, it stops helping.
What does a strong packet structure look like from front to back?
A practical packet should follow the way a homeowner thinks after you leave. They usually ask: who is this from, what did we talk about, what are my choices, what is included, what happens next, and why should I trust this company? Build the packet in that order.
A reliable sequence often looks like this.
- Cover page with company identity and homeowner/project name.
- Customer needs summary written in plain language.
- Recommended options with clear side-by-side comparisons.
- Detailed scope of work showing what is included.
- Installation-day expectations and preparation notes.
- Company process or standards page explaining how you handle the job.
- Frequently asked questions.
- Clear next steps and contact information.
If you want to include reviews, certifications, or manufacturer literature, do it selectively. Too many inserts make the packet feel generic. Your own pages should do most of the work. If a brochure helps explain a specific option, include only what is relevant.
It is also smart to think about packet length. For many contractors, six to ten focused pages is enough. A thinner packet that is actually read is better than a large packet that gets set on the counter and ignored.
How should contractors use the packet during the estimate appointment?
The packet works best when it is introduced during the conversation, not just dropped off at the end. The homeowner should see it as a guide, not just paperwork.
Use the packet to mirror your sales conversation. As you discuss needs, point to the customer-needs summary. As you review options, walk through the comparison page. As questions come up about labor or installation details, refer to the scope-of-work page. This creates continuity between what they heard and what they later review on their own.
Do not read every page word for word. That can feel stiff and slow. Instead, highlight the key sections and explain why they matter. For example, tell the homeowner that the scope page is important because not every quote includes the same tasks, or that the installation page answers the most common questions people have after they decide.
At the end of the appointment, summarize the packet in one minute. Remind them which option seems to fit their goals, where to find the pricing and scope details, and how to reach your office if they want to move forward. This keeps the leave-behind packet anchored to the conversation they just had.
If you email digital copies, make sure the printed and digital versions match. Mixed versions create confusion, especially if one includes a revised option and the other does not.
What copy and design choices make the packet more effective?
Good packets are easy to read. That sounds obvious, but many estimates are crowded with fine print, inconsistent headings, and text copied directly from manufacturer materials.
Use short paragraphs, clear section titles, and consistent labels. If you use terms like single-stage, two-stage, variable-speed, or communicating controls, explain them in plain language the first time they appear. Homeowners should not need a glossary to follow your recommendation.
Use white space generously. A packet that looks busy feels harder to trust because it feels harder to understand. Clear margins, bullet points, and repeatable formatting all help.
Photos can help if they are relevant. For example, a photo of a corroded coil, unsafe pad, poor return opening, or damaged disconnect can support a scope recommendation when applicable. But random stock imagery does little. Every page should earn its place.
Branding matters, but restraint matters more. A professional logo, color accents, and clean typography are enough. The packet is a decision support tool, not a flashy sales catalog.
Most important, write in the homeowner’s language. Instead of “system shall be commissioned per manufacturer specifications,” say “we test, start up, and confirm operation before we consider the installation complete.” Plain language does not make you sound less professional. It makes you easier to buy from.
What mistakes weaken a leave-behind packet even when the estimate itself is good?
One common mistake is turning the packet into a generic company folder. If every page could be handed to any homeowner on any job, it will not feel useful. The packet needs some job-specific content, especially the needs summary, options, and scope.
Another mistake is including too much technical material. Homeowners want enough detail to feel informed, but not so much that they feel unqualified to decide. A packet should create clarity, not dependence on another explanation call.
A third mistake is leaving the scope vague. If your option says “full installation” but does not clarify what that means, the homeowner may assume all quotes include the same labor and materials. That weakens your ability to defend price.
Many contractors also fail to address known limitations. If existing duct issues, electrical constraints, line-set conditions, condensate routing, equipment access, or control compatibility may affect final scope, say so carefully and clearly. Local requirements vary, and field conditions can change what is needed. Honest qualifiers are better than surprises later.
Another weakness is poor follow-up integration. If the packet says one thing and your office says another, trust drops fast. Everyone involved in sales, scheduling, and installation should know what the packet promises and how to use it.
Finally, some packets push too hard. Fake urgency, oversized discount language, or aggressive comparison charts can make homeowners defensive. If your article, conversation, and packet all say “we help you make the right decision,” the packet should feel consistent with that tone.
How can contractors build this packet without creating a lot of extra admin work?
The easiest way is to separate the packet into fixed pages and variable pages. Fixed pages are your reusable documents: company process, installation expectations, FAQ, and next steps. Variable pages are the job-specific pieces: cover page, customer-needs summary, options page, and scope of work.
Once you create the reusable pages, most of the work is in standardizing templates. Build a repeatable options layout. Build scope modules for common replacement scenarios. Build short prewritten language for common issues such as thermostat replacement, pad updates, basic drain work, filter access, or duct transitions, then have your estimator customize only what applies.
It also helps to create a packet checklist for your own team so pages are not forgotten. Sales consistency is often less about talent and more about process. When every estimator follows the same structure, your company becomes easier to buy from and easier to manage.
Review the packet every few months. Remove language that creates confusion. Add FAQ items that repeatedly come up in follow-up calls. Clarify pages that homeowners seem to misunderstand. Your packet should evolve based on real conversations, not just what looks good in the office.
What should contractors review before finalizing their packet?
Before rolling out a new replacement estimate leave-behind packet, test it against actual customer behavior. Ask whether a homeowner who was not present at the estimate could understand the recommendation by reading it. If the answer is no, it needs simplification.
Check whether the packet clearly answers these practical questions: Why was this system recommended? What is included? What are the differences between options? What should the homeowner expect on installation day? How do they move forward? If any of those are hard to find, reorganize the packet.
Also review the packet for compliance and local fit. Requirements for permits, inspections, code updates, and project scope can vary by location. Your packet should avoid blanket promises and should match how your company actually operates in your market.
Finally, make sure the packet sounds like your brand at its best: helpful, confident, and clear. The best leave-behind packets do not close jobs through pressure. They close jobs because they make the homeowner feel informed and comfortable taking the next step.
Frequently asked questions
Should every replacement estimate use the same packet?
The core structure should stay consistent, but the job-specific pages should be customized. Consistency improves professionalism, while customization shows the homeowner that the recommendation fits their home and concerns.
Is a digital-only packet enough?
For some customers, yes, but many still respond well to a printed leave-behind. A physical packet stays visible on the counter and is easier to share with a spouse or family member. Ideally, your printed and digital versions match.
How long should the packet be?
Long enough to answer the buyer’s likely questions and short enough that they will actually read it. For many contractors, a focused packet of several pages works better than an oversized binder full of generic inserts.
Should pricing be included in the packet?
Yes, if the packet is serving as the actual estimate leave-behind. The homeowner should not have to hunt for the numbers or wonder which page controls. Keep the pricing connected to the option descriptions and scope.
Can this approach work without a high-end sales process?
Absolutely. In fact, a good replacement estimate leave-behind packet is especially useful for contractors who want to sell in a straightforward, low-pressure way. It supports trust and clarity even if your presentation style is simple.
Final thoughts
A replacement estimate leave-behind packet is one of the simplest tools an HVAC contractor can use to improve follow-through after the appointment. It keeps your proposal from shrinking into a single price, and it helps the homeowner understand what they are buying, why you recommended it, and how to move ahead.
If your current estimate process ends with a quote sheet and a handshake, this is a practical upgrade worth making. Start small. Build the fixed pages first, tighten your options layout, and improve your scope clarity. Then refine it based on the questions homeowners ask most often. Over time, the packet becomes more than sales support. It becomes part of how your company communicates, sets expectations, and earns trust.
Join the HVAC Installer Network
Create an installer listing to help homeowners discover your business, learn about your services, view your company information, and connect with you about installation opportunities in your service area.
This article is for general informational purposes only. Installation scope, equipment selection, code obligations, permits, inspections, and other project requirements vary by home and by local jurisdiction. Contractors should follow manufacturer instructions, applicable codes, and their own documented company procedures.