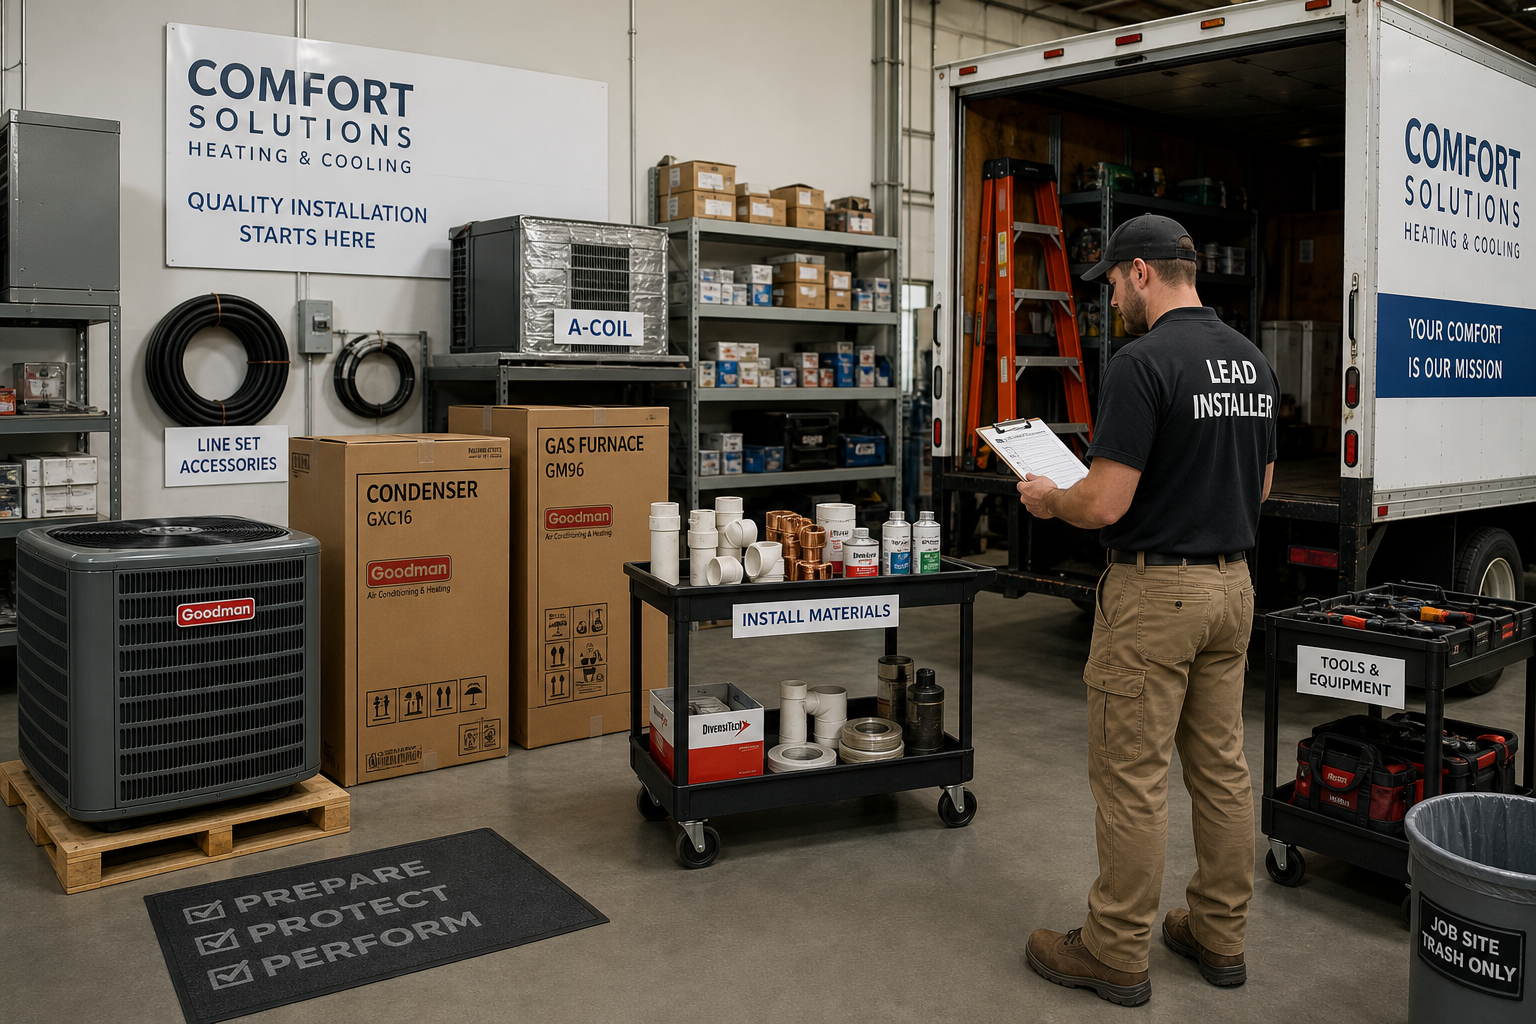
How HVAC Contractors Can Create a Simple Equipment Delivery and Staging Process That Prevents Install-Day Delays and Missing-Parts Chaos
A practical framework for moving every sold job from paperwork to warehouse to truck with fewer surprises, less scrambling, and better install-day execution.
Many installation problems do not start in the mechanical room. They start the day the job is sold, when key details are incomplete, accessories are assumed instead of confirmed, and equipment is not received, checked, staged, and loaded in a repeatable way. By the time the crew discovers a missing pad, wrong coil, unavailable disconnect, or unplanned transition, the schedule is already slipping and the customer is already wondering why the project feels disorganized.
A simple HVAC equipment delivery and staging process can solve a large share of that chaos. The goal is not to create a complicated warehouse system that requires new software, more managers, or endless paperwork. The goal is to build a practical sequence that helps your team answer the same questions on every replacement and every new install: What exactly was sold, what has arrived, what still needs to be sourced, where is it staged, who verified it, and is the truck truly ready to leave?
For many contractors, install-day delays come from preventable handoff failures. Sales assumes operations will fill in the blanks. Purchasing assumes the field can reuse existing items. The warehouse assumes any missing materials will be picked up on the way. Installers assume all accessories are in the truck because the equipment is on the truck. A strong process removes those assumptions.
In this guide, we will walk through a contractor-friendly delivery and staging workflow that can work for small shops and growing multi-crew companies alike. You can adapt the details to your market, your team size, and your local requirements, which vary by jurisdiction and job type.
The best staging process is not the one with the most forms. It is the one your sales team, warehouse staff, dispatchers, and installers will actually follow every day.
Why do install-day delays usually start before installation day?
Install-day delays are often blamed on traffic, supplier issues, or difficult homes, but many of them are created internally. The root problem is usually a broken chain of custody for information and materials. Once a job is sold, several things have to happen correctly in sequence. The equipment has to match the application. Accessories have to be identified. Materials have to be available. The warehouse has to know what belongs with that specific job. The install crew has to be able to confirm that what was staged is what they actually need.
When even one of those links is weak, the crew compensates in the field. That leads to emergency supply-house runs, improvised drain plans, missing trim pieces, duplicated labor, and rushed decisions. The direct cost is lost time. The hidden cost is schedule damage across the rest of the week, because one late first call can affect every crew movement that follows.
There is also a customer experience issue. Homeowners may not know whether a missing whip or line-hide fitting is a big deal technically, but they can absolutely tell when your team looks surprised. Confidence drops quickly when the install appears unplanned. A clean staging process helps your crews show up looking prepared, which supports trust before the first tool comes out.
Contractors sometimes try to fix this by telling installers to check the truck better. That matters, but it addresses the final symptom, not the earlier cause. Reliable install days come from a process that starts at the office and moves all the way through purchasing, receiving, staging, loading, and final verification.
- Sold job details are complete before purchasing begins.
- Every major component is matched to the specific job.
- Standard accessories and consumables are not left to memory.
- Received equipment is physically checked, not just marked as delivered.
- Install crews verify staged materials before departure.
What should be included in the sold-job handoff?
The sold-job handoff is the foundation of the entire HVAC equipment delivery and staging process. If the handoff is vague, everything downstream gets harder. Your warehouse cannot stage accurately if the sales file does not clearly state what was promised and what conditions exist at the jobsite.
At minimum, every sold install should move into operations with a standardized job packet. That packet can be digital, paper, or both, but the contents should be consistent. Include customer contact information, site address, equipment model numbers, fuel type, voltage, system type, indoor and outdoor match information, thermostat details, accessories sold, known duct or transition needs, condensate approach, pad or stand requirements, and any special notes that affect loading or staging.
Photos are especially valuable. A few jobsite pictures taken during the sales visit can reduce a lot of warehouse guesswork. If the install manager or warehouse lead can see the existing furnace platform, attic access, closet dimensions, disconnect location, line set route, and drain arrangement, they can stage more intelligently. This is not about perfection. It is about reducing avoidable unknowns.
One common mistake is allowing key scope items to live only in the salesperson’s memory. If a customer was promised a new thermostat wire, new pad, line-hide extension, or return base modification, that promise needs to appear in the packet. Another common mistake is listing equipment but not listing install materials. Equipment is only part of what a crew needs to complete the job professionally.
A practical handoff also identifies exceptions. If a line set reuse decision still needs confirmation, mark it clearly. If electrical work may be required, flag that before staging. If permits or inspections affect timing, document it for scheduling. Local requirements vary, so your process should leave room for those job-specific differences rather than assuming every install is identical.
A simple handoff checklist often works better than a long narrative estimate because it forces consistency. The goal is not elegant paperwork. The goal is operational clarity.
- Customer name, address, and primary phone number.
- Install date target and crew assignment if known.
- Outdoor unit, indoor unit, and accessory model numbers.
- Thermostat, IAQ, drain, pad, stand, and electrical notes.
- Photos of equipment location, access, duct connections, and existing setup.
- Special promises made during the sale.
- Open questions requiring pre-install confirmation.
How should equipment receiving work before staging begins?
Receiving is where many contractors accidentally create future install problems. If delivered equipment is accepted without inspection and then pushed straight into inventory or a staging corner, the team may not discover damage, shortages, or mismatched items until the morning of the job. At that point, even a small issue becomes disruptive.
A better receiving process is straightforward. When equipment arrives, a designated team member should compare what was delivered against the purchase order and the specific job assignment if the material is already allocated. Confirm model numbers, quantities, and obvious physical condition. Look for cabinet dents, coil packaging damage, missing literature kits, and crushed accessory boxes. If your distributor palletizes multiple jobs together, separate them immediately rather than letting materials blend into a general holding area.
It also helps to distinguish between received and verified. Just because a shipment hit the dock does not mean it is ready to stage. A green tag, bin card, shelf marker, or simple digital status can show that the equipment was checked and is approved for job staging. That small distinction reduces situations where the warehouse assumes a component is available but someone else already knows it arrived damaged or incomplete.
Standard materials deserve attention too. Contractors are often disciplined about checking condensers and furnaces but casual about line set covers, drain fittings, filter racks, breakers, disconnects, whip assemblies, and venting parts. Yet those are exactly the items that trigger the frustrating last-minute run. Receiving should not stop with major equipment if your goal is fewer install delays.
For custom or less common accessories, attach them to the job early. If a particular media cabinet, low-ambient accessory, slab sensor, or adapter kit is intended for one project, mark it with the customer name or job number when it comes in. Unlabeled specialty items tend to wander.
If you want the process to stick, give ownership to one role. In a smaller company, that may be the install manager or warehouse coordinator. In a very small shop, it may be the owner. What matters is that someone is accountable for saying, with confidence, that the job is ready to stage.
If your team regularly says, “I thought that came in already,” your receiving process is too informal.
What does a clean staging process look like in practice?
Staging should make the next step obvious. When a crew or driver walks into the warehouse, they should be able to identify the entire job package quickly and confirm what belongs on the truck. If staging still requires memory, interpretation, or a scavenger hunt, it is not finished.
A clean setup usually starts with a dedicated staging area divided by job. Some companies use floor zones, some use pallets, some use rolling carts, and some use rack positions. The method matters less than the consistency. Each job should have a visible identifier such as the customer name, install date, or job number. All major equipment and boxed accessories should be grouped together. Loose materials should be contained, not scattered.
Many contractors get strong results by separating materials into categories. For example, place the outdoor unit and pad together, the indoor equipment and transitions together, and a tote for accessories and small parts. Another tote can hold consumables or job-specific items that are easy to lose. This makes visual verification much easier than stacking everything loosely around a condenser carton.
It is also smart to define a standard bill of materials for common install types. A furnace and AC changeout has recurring items. A heat pump air-handler install has another pattern. A mini-split install has its own repeatable list. When your team starts from a standard package and then adds job-specific exceptions, staging becomes faster and more reliable than building every job from scratch.
That standardization can include things like pads, isolation feet, disconnects, whips, drain fittings, vent materials, transition supplies, thermostat wire, float switches, filter provisions, anchors, sealants, and startup basics. The exact list depends on your install style and local code requirements, which vary. The important part is deciding in advance what is standard rather than rediscovering it on every job.
Before a staged job is considered complete, someone should perform a final staging review. This is different from receiving. The question now is not whether the shipment arrived. The question is whether this specific job package is complete for the intended scope. A short checklist can drive that review.
- All major equipment present and matched to the job.
- All sold accessories staged with the equipment.
- Required install materials included for the planned scope.
- Special job notes attached to the package.
- Any open issue clearly flagged before the install date.
Do not overlook staging deadlines. If crews leave early, staging should be finished the prior day whenever possible. Morning-of staging creates pressure, and pressure creates misses. A same-day emergency job may require improvisation, but your planned work should not feel like an emergency.
How do you make truck loading and morning departure more reliable?
Even a well-staged job can fail if loading is rushed or undocumented. Truck loading is where staged materials become field reality, and that step deserves a process of its own. Too many contractors assume that because everything was staged near the truck bay, everything made it onto the truck. That assumption is often wrong.
The simplest improvement is to require a load verification before departure. One person can load and another can verify, or the lead installer can verify against the staging checklist. What matters is the pause for confirmation. The team should check major equipment, small accessories, and any unusual materials called out in the job notes.
Truck organization matters too. If your crews have to unload half the van to find a thermostat base or condensate switch, your staging process is only doing part of the job. Standardize where certain categories live on every vehicle. Keep consumables, fittings, fasteners, electrical items, drain parts, and startup tools in defined places. A predictable truck layout reduces the chance that staged materials are buried, forgotten, or duplicated.
Some contractors create a simple depart-ready routine. It may include confirming fuel level, recovery cylinders, vacuum pump, commissioning tools, ladders, drop cloths, and homeowner protection materials in addition to the staged equipment. That routine turns departure into a habit rather than a scramble.
Another smart step is to call out known constraints before the crew leaves. If the home has difficult access, a crane window, a tight attic opening, a tenant coordination issue, or a special arrival instruction, the installers should not learn that from the customer at the door. Include those notes in the job packet and morning huddle.
Finally, give crews a clear path for reporting missing items without blame. If they discover a miss before leaving the lot, they should feel comfortable stopping the departure and getting it fixed. A culture that punishes people for speaking up encourages silent workarounds, and silent workarounds become expensive field delays.
The last five minutes in the warehouse are often more valuable than the first thirty minutes of a delayed install.
How can contractors improve the process without overcomplicating it?
The biggest risk in process improvement is building something your team will not sustain. A good HVAC equipment delivery and staging process should be visible, repeatable, and easy to teach. If it depends on one highly organized person or a complex software workflow no one follows in the field, it will break under growth or staff changes.
Start by mapping your current workflow on one page. From sold job to install morning, write down each handoff and who owns it. You will often find that delays come from just two or three weak moments, such as incomplete sold-job notes, no receiving inspection, or no final load verification. Fix those first.
Next, create standard checklists for the roles involved. Keep them short enough to use daily. A sales handoff checklist, receiving checklist, staging checklist, and departure checklist are often enough. If your team ignores a checklist, it is probably too long or not tied to one clear owner.
Use post-job feedback to tighten the system. Ask installers a simple question after each job: what did we have to leave for, improvise, or source at the last minute? Track the answers for a month. Patterns will appear quickly. Maybe your team repeatedly misses vent fittings on 80 percent furnaces. Maybe line-hide transitions are underestimated. Maybe return-air materials are not being added consistently by sales. Those patterns tell you where standardization is needed.
It also helps to define what counts as a staging failure. If a crew had to stop for any missing job-specific part, mark it. If the wrong equipment was staged, mark it. If a customer-promised accessory was not on the truck, mark it. When the definition is clear, the team can improve it. Without a shared definition, everyone uses different standards and the process becomes subjective.
Do not forget vendor communication. Distributors and suppliers can support your process if you are clear about labeling, allocation, and delivery expectations. If your company frequently receives mixed deliveries for multiple jobs, ask whether there is a cleaner pick-and-tag approach available. You may not need a perfect solution. Even a modest improvement in how material arrives can reduce warehouse confusion.
Most important, avoid the temptation to solve recurring staging issues only with heroics. Sending a runner, borrowing from another job, or asking an installer to “make it work” can save the day once, but if it happens often, it hides a process weakness. Strong operations are built by reducing the number of hero moments your team needs.
- Map the current workflow from sale to departure.
- Assign one owner to each handoff.
- Build short checklists for sales, receiving, staging, and loading.
- Track every missing-part trip for thirty days.
- Standardize recurring materials by install type.
- Review misses weekly and adjust the process.
Frequently Asked Questions
Do small HVAC companies really need a formal staging process?
Yes. In fact, smaller companies often benefit the most because one missed part can disrupt the entire day. The process does not have to be complicated. A simple checklist, a designated staging area, and clear ownership can make a major difference.
Who should own the HVAC equipment delivery and staging process?
That depends on your company structure, but ownership should be clear. In many businesses, the install manager, warehouse coordinator, or operations lead is the best fit. In smaller shops, the owner may initially handle it until the process is stable enough to delegate.
Should every job get staged the day before installation?
Whenever possible, yes. Day-before staging gives your team time to discover shortages or damage before the truck is supposed to leave. Emergency jobs may require same-day handling, but planned replacements usually run better with prior-day staging.
What is the most common cause of missing-parts chaos?
Usually it is not one dramatic failure. It is a series of small assumptions. Sales assumes operations will fill in details, operations assumes the warehouse has standard materials covered, and installers assume staged means complete. A documented handoff breaks that chain of assumptions.
How do we improve without buying new software?
Start with process discipline before technology. Many contractors can get far better results with a shared job packet, physical staging labels, and role-based checklists. Software can help, but it is not a substitute for clear responsibility and consistent execution.
Final Thoughts
A strong HVAC equipment delivery and staging process is not glamorous, but it directly affects labor efficiency, schedule control, customer confidence, and install profitability. When crews leave with the right equipment, the right accessories, and the right job notes, they spend more of the day installing and less of it searching, waiting, and apologizing.
If your company is dealing with install-day delays and missing-parts chaos, resist the urge to treat every problem as a one-off. Look upstream. Tighten the sold-job handoff. Inspect received materials. Stage by job. Verify the load. Review misses. Those basic habits create a system your team can trust.
The best version of this process is usually simple enough to use every day and strong enough to catch common failures before they reach the field. That is how smoother install days are built.
Join the HVAC Installer Network
Create an installer listing to help homeowners discover your business, learn about your services, view your company information, and connect with you about installation opportunities in your service area.
This article is for general informational purposes and is not a substitute for manufacturer instructions, project-specific planning, safety procedures, or professional legal, code, or licensing guidance. Equipment compatibility, installation requirements, permitting, inspection procedures, and other local requirements vary by jurisdiction, supplier, and application.