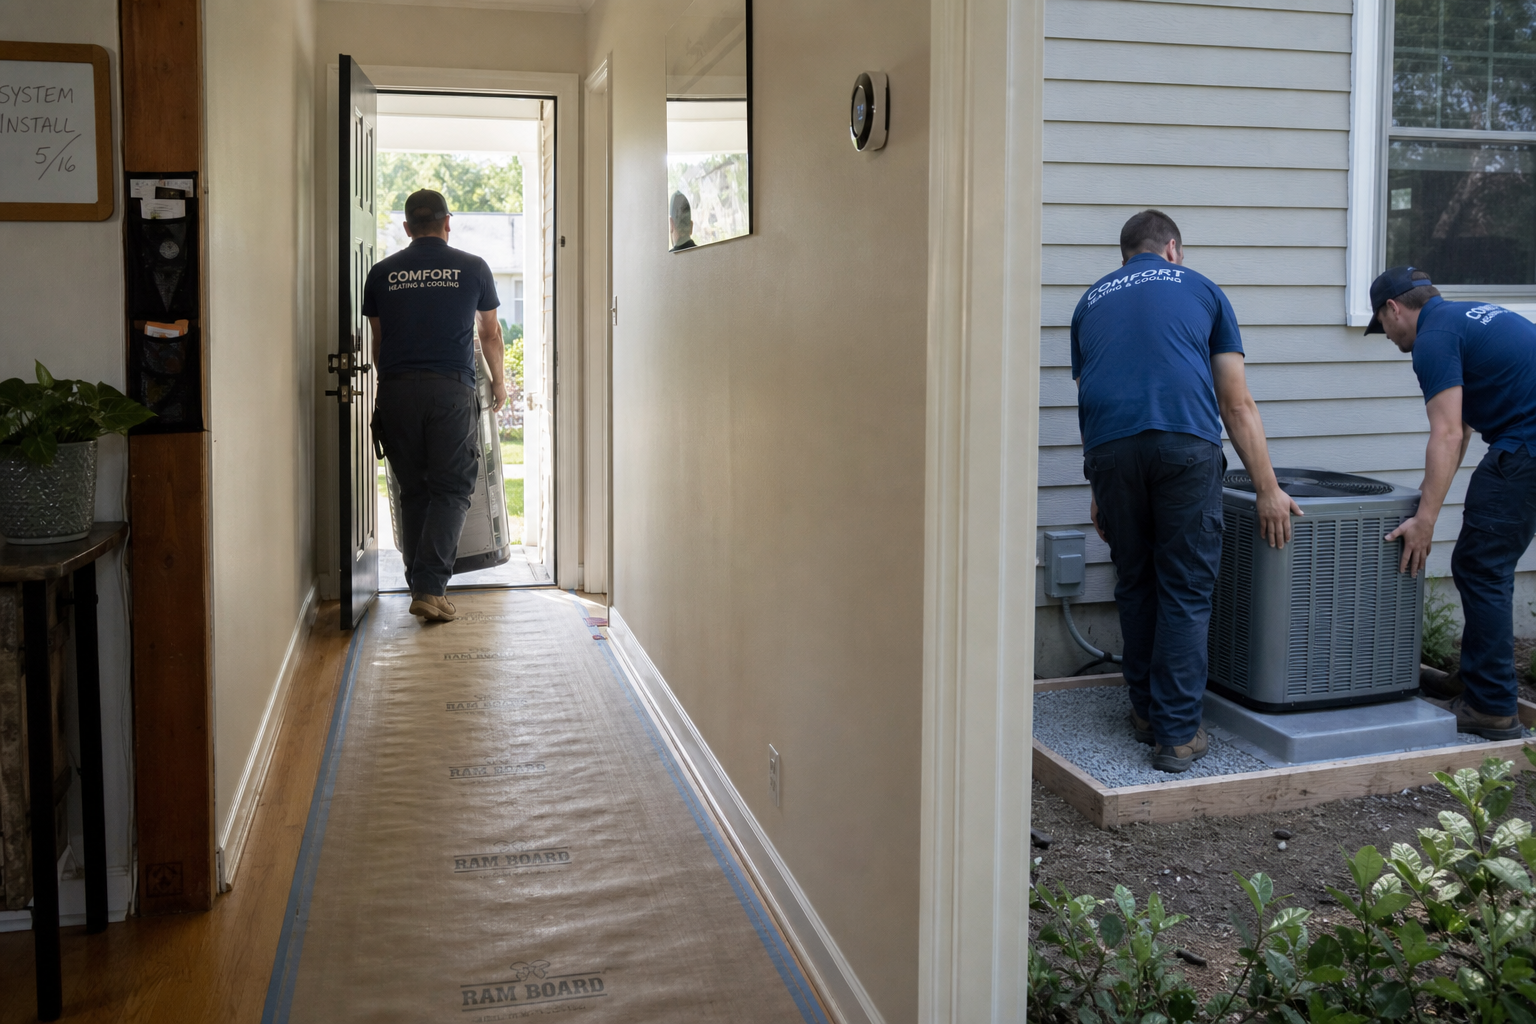
How to Prepare Your Home for an HVAC Installation
Simple steps that help installation day go more smoothly, protect your home, and reduce last-minute surprises.
If you are replacing or installing a heating and cooling system, a little preparation can make a big difference. HVAC installation day often involves technicians moving large equipment, entering multiple parts of the home, shutting off power, and testing the new system before they leave. When the work area is ready, the job is usually cleaner, safer, and easier for everyone involved.
For homeowners, the goal is not to do the installer’s job. It is to remove obstacles, make access simple, and know what to expect. That can mean clearing a path to the indoor unit, moving fragile items, planning for pets and children, and confirming where the crew will need to work outside. It also helps to understand that every home is different. The layout, equipment type, attic or crawlspace access, and local requirements vary, so your installer may have project-specific instructions.
This guide walks through practical ways to prepare your home for HVAC installation, including what to do the day before, what to expect when the crew arrives, and what to review before the job is complete.
The best way to prepare your home for HVAC installation is to focus on access, safety, and communication. Clear the work zones, confirm the arrival plan, secure pets, and be available for a final walkthrough.
What areas of the home should you clear before HVAC installation?
Start by identifying every place the crew may need to access. In many homes, that includes the indoor air handler, furnace, closet, basement, garage, attic opening, crawlspace entry, thermostat location, electrical panel, and the route between the front door and those areas. If your system includes ductwork modifications, technicians may also need room near supply and return vents or trunk lines.
Clear a wide path so installers can safely carry tools, sheet metal, refrigerant lines, and equipment components. Remove small tables, lamps, baskets, shoes, rugs, and decorative items from hallways and tight corners. If the indoor unit is in a utility closet or garage, move stored boxes, paint cans, holiday decorations, and anything stacked around the equipment.
In finished spaces, think about wall art and fragile decor near narrow walkways. Large equipment can be awkward to move, and even careful crews benefit from extra clearance. You do not need to empty an entire room, but giving the crew room to work around the unit helps prevent delays and accidental damage.
If the unit is in an attic, make sure the attic access is unobstructed. Move furniture away from the hatch or pull-down stairs. If the opening is in a closet, remove clothing, storage bins, or shelving items that block access. For crawlspaces, unlock gates or doors and clear the entry area so the crew can move in and out without fighting overgrown landscaping or stored materials.
It is also smart to protect items that are sensitive to dust. Installation may involve cutting, drilling, removing old equipment, or opening duct connections. Even when a crew uses drop cloths and takes care, some dust or debris can shift. Consider covering nearby shelves, electronics, or laundry area items if they sit close to the work zone.
- Clear pathways from the main entry to the indoor equipment.
- Move storage away from the furnace, air handler, or utility closet.
- Make attic or crawlspace access easy and safe to use.
- Remove fragile decor near tight hallways and corners.
- Keep the thermostat, vents, and electrical panel accessible.
- Cover nearby belongings if dust may be an issue.
If you are unsure how much space is enough, ask your installer in advance. A quick phone call or message can help you avoid overpreparing or missing an important access point.
How should you prepare the outdoor unit area?
The outdoor portion of the system needs working room too. Whether you are installing an air conditioner, heat pump, or packaged unit, the crew may need access to the condenser location, service disconnect, refrigerant line path, and drainage areas. Before installation day, trim back shrubs or branches that crowd the unit location and move outdoor furniture, planters, hoses, toys, or grills out of the way.
If the old unit sits behind a locked gate, make sure the gate opens fully and that pets are secured elsewhere. If the crew must pass equipment through the side yard, check for obstacles like uneven pavers, muddy sections, or clutter that could slow them down. You do not have to landscape the area, but a clear route makes moving heavy equipment easier and safer.
If the installation includes a new pad or a slightly different unit position, ask the contractor whether you should expect digging, leveling, or short-term disturbance near the foundation. Some jobs are straightforward replacements, while others require line set adjustments, drainage updates, or new electrical routing. The installer can explain what they anticipate for your specific project.
Parking is another practical detail homeowners sometimes forget. If possible, leave room for the crew’s truck near the house. Installers often carry large tools, recovery machines, ladders, and replacement equipment. Easy parking can save time and reduce repeated trips across the property.
Also look around for anything that might be affected by sound or temporary shutoffs. Outdoor HVAC work can be noisy at times. If you work from home, have a baby who naps during the day, or need a quiet environment for calls or meetings, it helps to plan ahead.
Outdoor preparation does not need to be complicated. Most homeowners simply need to clear the space, trim back vegetation, unlock gates, and make sure the technicians can get equipment in and out without obstruction.
Because equipment placement and code-related details vary by location, do not assume the new unit will go in exactly the same position without confirming it. Your contractor can tell you if local requirements vary and whether any spacing or placement adjustments are expected.
What should you do about pets, children, and daily routines?
HVAC installation day is not ideal for free-roaming pets or unpredictable foot traffic. Technicians may carry sharp tools, open access panels, work with ladders, and move heavy components through doors and hallways. Even calm pets can become anxious around strangers and noise, and children may be curious about what the crew is doing.
The easiest approach is to create a plan before the crew arrives. Keep dogs and cats in a closed room away from the work zone, or arrange for them to stay with a friend, family member, or pet care provider during the noisiest part of the day. For children, set boundaries about where they can and cannot go, especially if technicians need to move between indoor and outdoor areas with doors opening frequently.
Think about your routine too. In many installations, power to part of the home may be shut off temporarily. Heating or cooling will likely be unavailable during the work. If the weather is very hot or cold, plan for comfort accordingly. You may want water, fans, extra layers, or a temporary quiet space away from the main work area.
If someone in the home works remotely, attends online classes, or has health considerations related to temperature, air quality, or noise, mention that before installation day. The contractor may not be able to eliminate disruption, but good communication helps set expectations and may allow the crew to sequence parts of the job more thoughtfully.
It is also wise to decide who will be home. Someone authorized to make decisions should be available in case the crew has questions about thermostat placement, access, drainage routing, or minor field adjustments. If you cannot be present the whole time, ask whether someone needs to be there at arrival, during a mid-job check-in, and for final startup.
- Secure pets away from indoor and outdoor work areas.
- Keep children clear of equipment paths and active work zones.
- Plan for a temporary loss of heating, cooling, or power.
- Tell the installer about remote work, medical, or scheduling concerns.
- Make sure a decision-maker is reachable during the job.
Installers are used to working in occupied homes, but a calm environment helps everyone. A little planning reduces stress for the household and allows the crew to focus on the installation.
What questions should you confirm with the installer before arrival?
One of the best ways to prepare your home for HVAC installation is to confirm the plan in advance. Homeowners often assume the job will unfold a certain way, but every system and home layout is different. A short pre-installation conversation can clear up timing, access, and expectations.
Start with arrival details. Ask for the installation date, expected arrival window, and whether the job will likely be completed the same day. Some replacements are straightforward, while others take longer because of duct updates, electrical work, thermostat changes, or space constraints. Knowing the rough schedule helps you plan childcare, pet care, work calls, and parking.
You should also ask exactly which parts of the home the crew will need to access. That can include indoor mechanical areas, attic or crawlspace entries, the thermostat, the electrical panel, and the outdoor unit location. If there is anything unusual about your property, such as a narrow gate, steep driveway, historic finishes, or limited attic clearance, mention it ahead of time.
Other useful questions include whether the crew will remove the old equipment, what kind of floor protection they use, whether power or water may need to be shut off temporarily, and whether you should expect noticeable noise or dust. Many contractors cover these points automatically, but it is still worth confirming.
Thermostat planning is another important topic. If a new thermostat is part of the project, ask whether the existing location will remain the same. If you want to discuss placement or smart thermostat features, do it before installation day becomes busy.
You can also ask what paperwork or walkthrough will happen at the end. A professional handoff often includes basic operating instructions, filter access, thermostat guidance, and an explanation of any maintenance steps the homeowner should know. Permit and inspection processes, if applicable, vary by location, so ask your contractor how that works in your area.
Good preparation starts with good communication. Ask what access is needed, how long the work may take, whether old equipment will be removed, and what final walkthrough you should expect before the team leaves.
Here is a simple pre-installation checklist you can use when speaking with your contractor.
- Confirm the installation date and arrival window.
- Ask whether the work is expected to take one day or more.
- Verify all indoor and outdoor access points the crew will need.
- Ask about power shutoffs, noise, dust, and floor protection.
- Confirm old equipment removal and debris cleanup.
- Discuss thermostat plans and any questions about controls.
- Ask what final walkthrough and homeowner instructions are included.
- Remember that permit and inspection requirements vary locally.
What happens during installation day inside the home?
Knowing what installation day may look like can make the process feel much less disruptive. While each project is different, most jobs begin with the crew reviewing the equipment, protecting work areas, and confirming access points. They may walk the route from the truck to the indoor and outdoor equipment locations before bringing materials in.
If you are replacing an existing system, the old equipment usually needs to be disconnected and removed first. That can involve shutting off electrical power to the HVAC system, recovering refrigerant where applicable, disconnecting venting or drainage components, and carefully taking the old unit out of the space. During this time, you may hear drilling, cutting, lifting, or movement in walls, ceilings, or utility areas.
Once the old equipment is out, the crew can begin setting the new system in place. Depending on the project, that may include adjusting the pad outside, reconnecting or replacing refrigerant lines, making electrical connections, modifying plenums or transitions, sealing duct connections, updating drain lines, or installing a new thermostat. Not every installation includes all of those tasks, but homeowners should expect more than simply swapping one box for another.
Inside the home, installers may move between the mechanical area and the thermostat several times while testing wiring and controls. They may also check airflow, inspect supply and return performance, and verify that the system starts, runs, and shuts down correctly. If ductwork changes are part of the scope, some rooms may see additional activity.
There may be periods where it seems quiet and periods where the work is loud. That is normal. Some tasks involve setup, brazing, wiring, testing, or waiting for pressures and temperatures to stabilize. The crew may not need constant homeowner input, but they might check in if they find an issue like damaged ductwork, a blocked drain path, or limited access that affects the original plan.
During the day, try to keep hallways and work areas open. Avoid running laundry, stacking deliveries in front of the utility room, or moving items back into cleared spaces too early. If you have questions, it is fine to ask, but give the technicians room to work safely and efficiently.
The main thing to remember is that an HVAC installation is part mechanical work, part electrical work, and part jobsite coordination. Your preparation helps reduce interruptions so the crew can focus on doing the work correctly.
What should you inspect before the crew leaves?
Before the installation is considered complete, ask for a final walkthrough. This is your chance to understand how the new system operates and to make sure the work areas have been cleaned up reasonably. You do not need to perform a technical inspection, but you should leave the conversation knowing how to use the system and what was done.
Start with the thermostat. Ask the installer to show you how to switch modes, adjust temperature settings, understand fan options, and recognize any maintenance reminders or alerts. If you have a smart thermostat, ask about app setup, scheduling basics, and anything that may require a password, account, or Wi-Fi connection.
Next, ask where the filter is located and how to access it. Many homeowners assume they know where the filter goes because the old system had one in a familiar place, but new installations sometimes change filter size or access location. Knowing this on day one can make future maintenance much easier.
You should also ask the installer to point out the indoor unit, outdoor unit, disconnect, drain line, and any important shutoff locations. If your system includes secondary drain protection or safety switches, ask what they do and what to watch for if the system stops unexpectedly.
Walk the path the crew used and inspect the general condition of floors, walls, and nearby items. Minor dust can happen on many projects, but tools, packaging, old parts, and debris should not be left scattered around. The old equipment should be removed if that was part of the agreement.
Finally, ask whether there is anything specific about your home or installation you should monitor over the next few days. For example, the contractor may want you to note unusual sounds, check that condensate drains properly, or keep an eye on comfort in certain rooms after duct adjustments. They should also tell you who to contact if you have a question after startup.
- Get a full thermostat demonstration before the crew leaves.
- Confirm filter size, location, and replacement access.
- Identify the indoor unit, outdoor unit, disconnect, and drain line.
- Ask about safety switches, alerts, or normal startup behavior.
- Review cleanup and confirm old equipment removal if included.
- Find out who to call if you have questions after installation.
A good walkthrough turns a completed installation into a system you feel comfortable using. Do not rush it if you still have questions.
Frequently Asked Questions
Do I need to be home during the entire HVAC installation?
Usually, it helps to be home when the crew arrives and when the final walkthrough happens. For the middle portion of the job, policies vary by contractor and homeowner comfort level. Ask your installer what they require.
Should I cover furniture before HVAC installation?
If furniture or belongings are close to the work area, covering them can be a smart precaution. Most professional crews use protective materials, but a little extra protection around dust-sensitive items is often worthwhile.
How much space should I clear around the furnace or air handler?
There is no universal answer because equipment rooms and access routes differ. In general, give the crew enough room to remove old equipment, set new equipment, and work with tools safely. If you are unsure, ask for guidance before installation day.
Will my power be turned off during HVAC installation?
In many cases, power to the HVAC system will be shut off, and sometimes other nearby electrical circuits may be affected briefly. Your installer can explain what to expect for your specific project.
Can I stay in the house while the HVAC system is being installed?
Most homeowners do stay in the house, but there may be noise, temporary discomfort, and periods without heating or cooling. If anyone in the home is sensitive to temperature, dust, or disruptions, plan ahead and discuss concerns with the contractor.
Final Thoughts
Preparing your home for HVAC installation does not require technical experience. The most helpful steps are simple: clear the access path, secure pets, make the outdoor unit area easy to reach, confirm the schedule, and stay available for questions and the final walkthrough. Those basics can help the project move more smoothly and reduce stress on installation day.
Every home and HVAC system is a little different, so treat this guide as a starting point rather than a rigid checklist. Your contractor may have additional instructions based on your layout, equipment type, and local requirements. When in doubt, ask before the crew arrives. A few minutes of communication can save time and prevent surprises.
Find an HVAC Installer Near You
Search the HVAC Installer Network to find local professionals, review installer profiles, and connect with contractors serving your area.
This article is for general homeowner education only. Installation steps, equipment configurations, access needs, permits, inspections, and code-related requirements vary by home and by location. Always follow the instructions provided by your licensed HVAC contractor and confirm local requirements with the appropriate authority when needed.